
Creating Google Ads Account: A Beginner-Friendly Walkthrough
Creating Google Ads Account: A Beginner-Friendly Walkthrough


You've got a fresh Google login, a credit card nearby, and the Start Now button waiting at ads.google.com. It's tempting to rush through the form and launch an ad before the coffee gets cold. That's how advertisers end up with the wrong account owner, mismatched billing details, missing conversion data, and campaigns that spend before anyone knows what counts as a result.
Creating a Google Ads account is more than registering a profile. Google's setup flow connects your business identity, campaign intent, budget, billing, and future policy checks. Set those foundations carefully and campaign management becomes much easier. Skip them and you'll spend your first week repairing setup decisions instead of improving performance.
Before You Create Your Google Ads Account
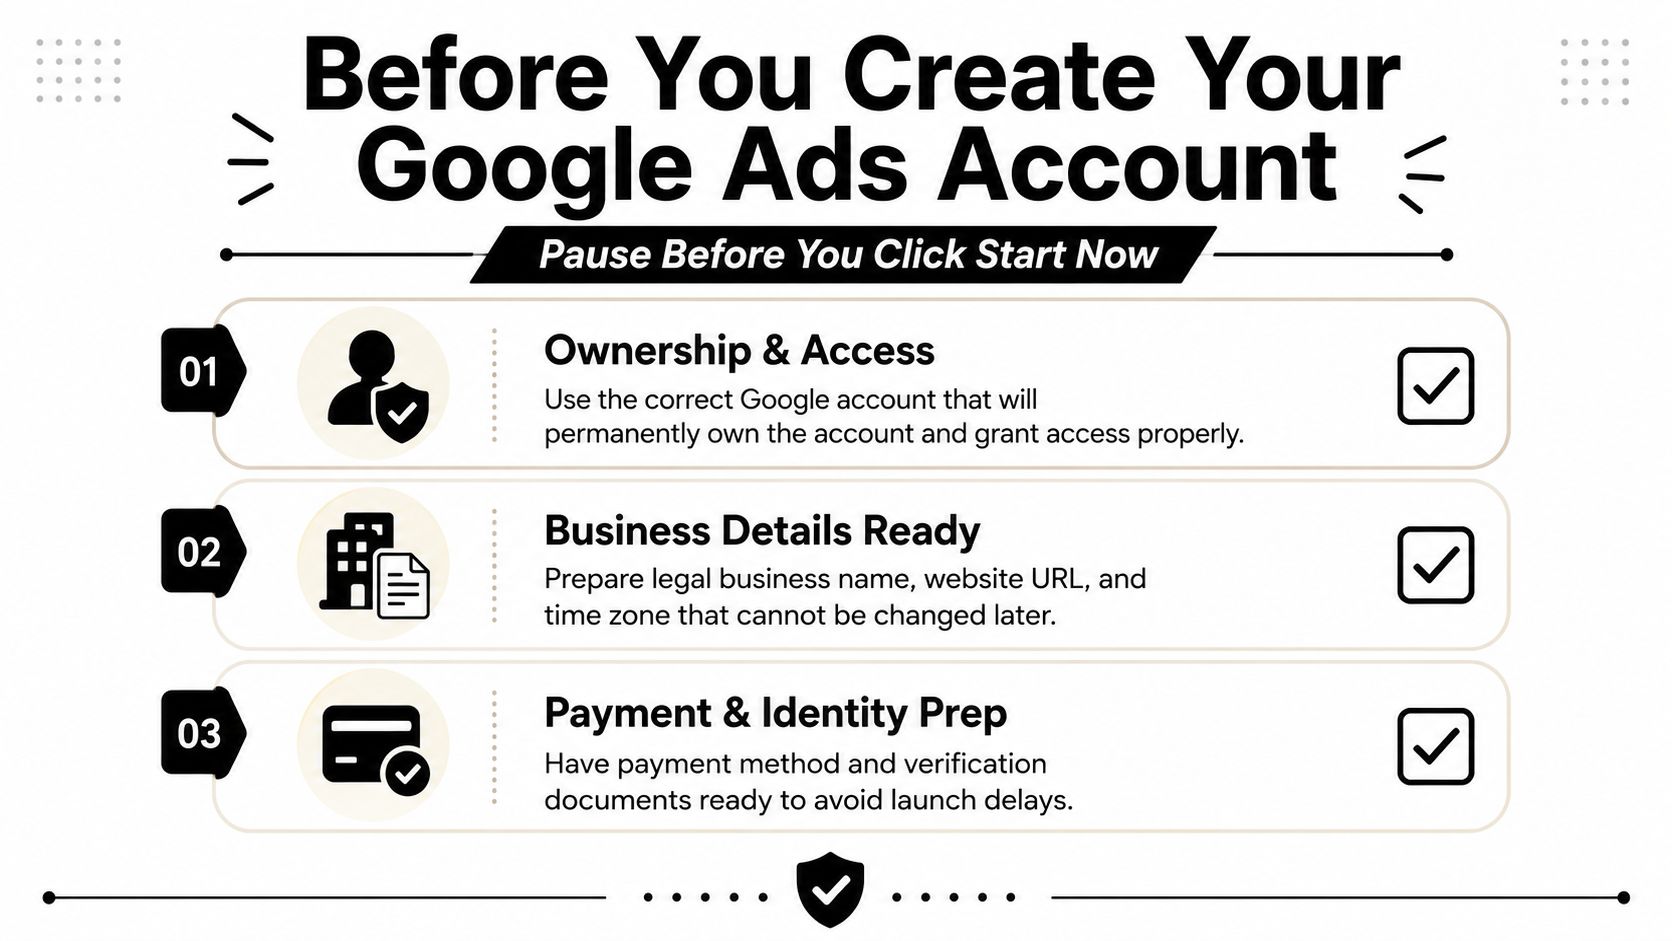
The strongest Google Ads setups begin before the browser opens. Prepare three things first: clear business ownership, accurate business details, and a measurable conversion goal. Those decisions influence who controls the account, how Google handles billing and verification, and what your campaigns will optimize toward later.
Start with the Google account that should permanently own the advertising property. Don't use a freelancer's personal Gmail because they're helping today. If an agency or internal marketing team manages several businesses, decide whether a manager account makes sense before creating individual accounts. Google supports account creation from a manager account, and those accounts can be launched from the Accounts page without an extra email address or password, according to its Google Ads account creation guidance.
Prepare the information Google will need
Have your legal business name, website URL, billing address, country, currency, and time zone ready. Keep the name and address consistent across your website, payment profile, and verification documents. A mismatch doesn't prove wrongdoing, but it creates avoidable friction when Google asks you to confirm the advertiser behind the account.
Then write one plain sentence describing the offer. “Emergency plumbing repairs for homeowners in Manchester” is more useful during setup than a vague phrase such as “full-service solutions.” You'll use that clarity when selecting campaign goals, writing landing-page copy, and deciding which searches deserve attention.
Finally, choose the one action that matters most at launch. It might be a completed lead form, a phone call, or a checkout. Don't start with a long list of soft interactions. A focused conversion plan gives your first campaign a clear job and leaves less room for misleading reporting.
Signing Up and Setting Up Business Details
Go to ads.google.com and select Start Now. Sign in with the Google account that should own the account, then review whether the default guided experience gives you enough control. If it pushes you toward choices you haven't planned, look for Switch to Expert Mode so you can work with the full campaign structure.

Choose a standard Google Ads account when you're advertising one business and want a direct working environment. Choose a manager account when you're coordinating multiple brands, clients, or separate advertising accounts. An MCC is an access and organization decision, not a campaign strategy, so don't create one just because it sounds more advanced.
Google's onboarding flow is built around three core tasks: add business information, select campaign goals and budget, and enter payment details. The company describes new users starting from the Google Ads homepage with Start Now, while manager-account users can create accounts directly from the Accounts page. That means the first form is already shaping the account's operating context, not merely collecting contact details.
Select the details that affect delivery
Choose the goal that best matches the action you want from customers, such as sales, leads, website traffic, or awareness. Treat that selection as a working direction, not a substitute for campaign planning. Google may use it to suggest campaign options, but you still need to inspect every setting before accepting the defaults.
Enter the business name, country, currency, and time zone carefully. The time zone affects reporting boundaries and daily pacing, so choose the zone that matches how the business wants its advertising day measured. Confirm the account name displayed in the navigation before moving on. A confusing account name creates needless mistakes when someone manages multiple properties.
Use the following walkthrough as a visual reference for the click path and account handoff:
Eligible advertisers who have spent more than $1,000 USD and are in good standing may create a Google Ads account without creating a campaign first, according to Google's account setup documentation. For a new advertiser, that option is useful when you need to establish billing and access before building campaigns, but don't use it as an excuse to postpone the tracking and verification work.
Billing, Payment Verification, and Identity Checks
Payment setup is where a casual registration becomes an active advertising account. Open the billing area from the Google Ads interface, add the payment method that belongs to the business, and check that the billing name and address match the information you prepared earlier.

Google may require payment-method confirmation through a bank charge code. The documented process is specific: select the payment method, choose Get code, find the Google charge in the bank account, take the last six digits of that charge, enter them back into Google Ads, and submit the verification through the billing or policy workflow described in Google's payment verification instructions.
Don't guess the code or use a card that belongs to an unrelated person unless you have a clear business reason and documentation. A consistent payment profile makes the account easier to explain when Google reviews advertiser identity.
Finish advertiser verification before launch
Google may ask organization questions and require advertiser identity verification. When prompted, go to Admin, then Policy, then Account, and select Start task or Start verification. The process can include payment-method confirmation and document submission, as outlined in Google's advertiser verification requirements.
Upload authentic, readable documents and make sure the legal name and address align with the account. Avoid blurry images, cropped pages, or documents that belong to a different entity. Google states that missing a required verification deadline can pause the account, so treat the request as a launch blocker, not an administrative task for later.
If you're estimating the financial side of setup, use this practical guide to how much Google Ads costs. Keep your first payment profile stable, complete verification when it appears, and save access details where the business can recover them without depending on one employee.
Common Setup Mistakes That Get Accounts Flagged
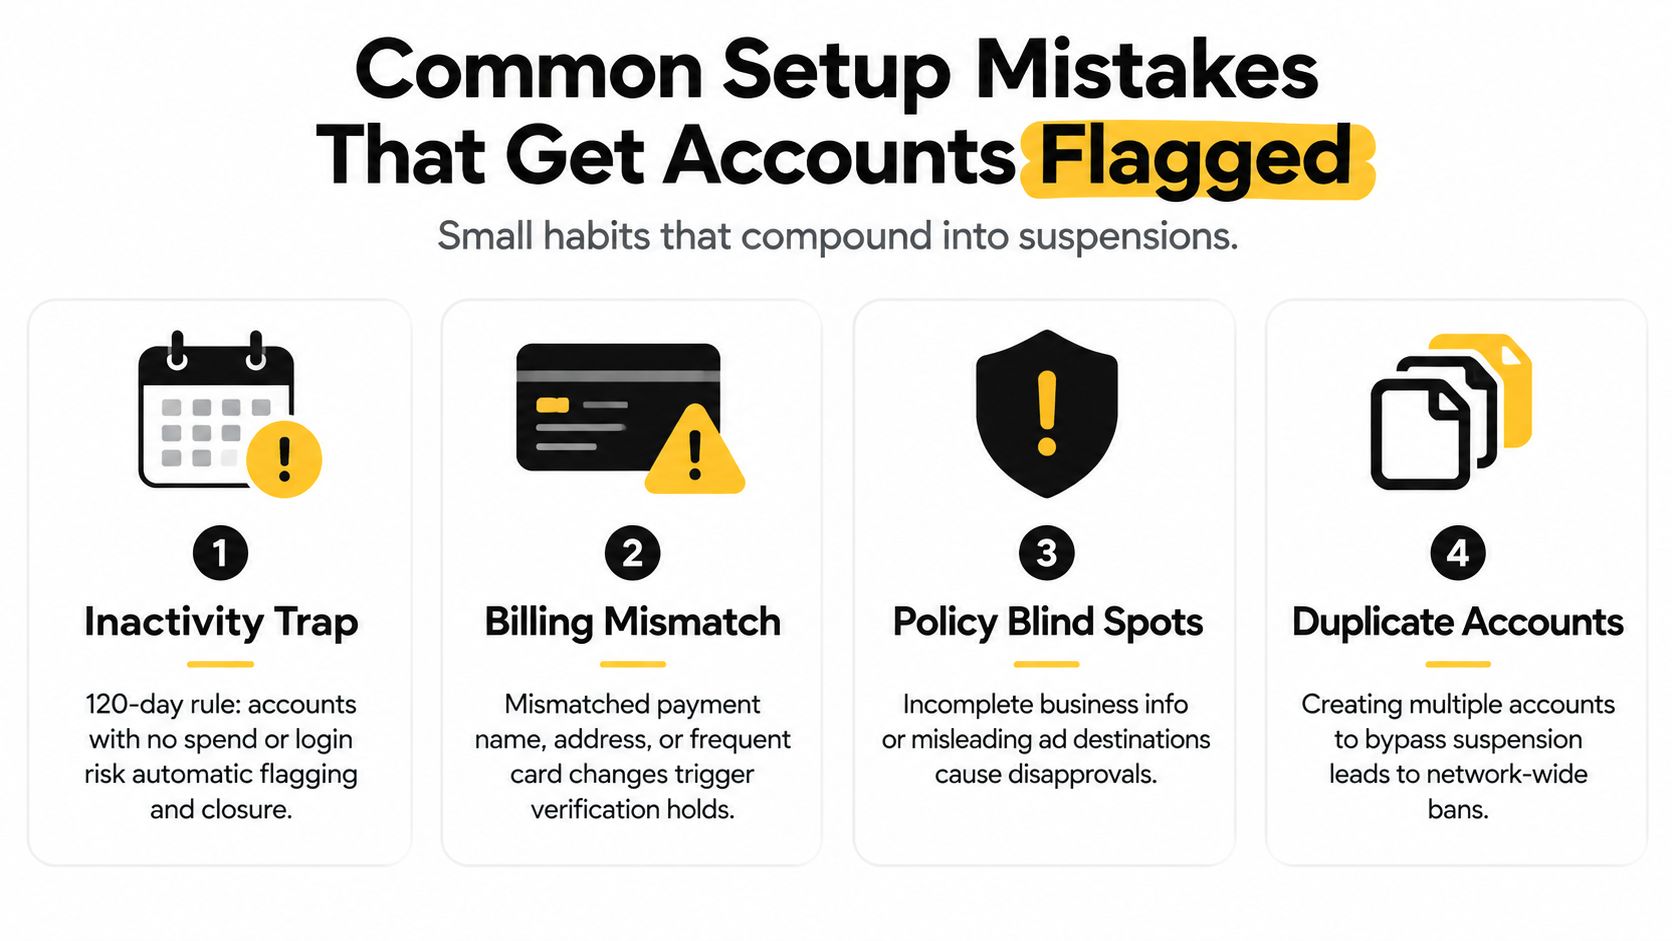
A new account can trigger review before the first campaign spends anything. The usual cause is an inconsistent setup: several accounts for one business, mismatched ownership, an unconvincing website, or payment details that cannot be explained. Keep the structure clear. Use one legitimate legal entity, accurate business information, and payment details supported by the company.
Inactivity creates a separate problem. An account created from a manager account can be canceled if it stays inactive for more than 120 days. Google explains this rule in its account creation policy guidance. Log in, maintain the account, and do not treat registration as a permanent archive. Cancellation can remove the working history you expected to keep.
Diagnose the trigger before changing everything
Do not build a large campaign structure on day one. Bulk-creating campaigns, keywords, and ads can look unusual even when each item appears compliant. Start with a small, logically organized setup that connects the business, website, payment profile, and advertising activity.
Review these common policy risks before launch:
- Trademark misuse: Do not put another company's brand in ad copy without authorization.
- Unsupported claims: Remove health, financial, or performance promises that the landing page cannot prove.
- Weak destinations: Test every landing page on mobile. It must load correctly and deliver what the ad promises.
- Missing offer details: Make pricing conditions, eligibility rules, and purchase terms easy to find.
Creating multiple accounts to bypass enforcement is another serious mistake. Inconsistent business or payment identities can also prompt additional review. Read how to audit your ad account, then check redirects, disapprovals, ownership, and payment details as one connected system.
Keep the original business address and account email accurate. Changing either after the first charge can create extra review work and make the account history harder to explain. If a detail is wrong, correct it before the campaign goes live.
Wiring Up Conversion Tracking and Google Analytics
Clicks aren't the outcome. A new advertiser needs to know whether a click produced a lead, a call, a purchase, or nothing useful. Set up measurement before judging keywords, because Google Ads can't optimize toward an action it can't reliably record.
Install the Google tag across the website, ideally through Google Tag Manager. The tag establishes the site-level measurement foundation. The conversion event then fires only when the chosen action occurs, such as a form submission, completed purchase, or qualified phone call.
Build one clean conversion action
Start in Google Analytics 4 and define the event that represents success. For example, a form confirmation page can trigger a lead event, while a purchase event should pass the transaction details your store already records. Avoid counting every pageview as a conversion. That turns ordinary browsing into fake success data.
Then create or import the corresponding conversion action in Google Ads under Tools, then Conversions. Link the GA4 property through Linked Accounts, choose Google Analytics 4, enter the property information, and enable auto-tagging so Google can connect sessions and revenue to ad clicks.
For a more detailed implementation walkthrough, use this guide to Google Ads conversion tracking. Keep the conversion definition identical in both platforms. If GA4 calls one action a lead while Google Ads counts a different thank-you page, your reports will disagree and your bidding decisions will become guesswork.
Test before spending seriously
Submit a test form, complete a test purchase where appropriate, and check whether the event appears once. Missing conversions often come from a tag firing twice, an event firing during a redirect, or a conversion action counting a pageview instead of the actual confirmation step.
Once data flows, watch the Conversions column and confirm that imported audiences and attribution settings reflect the business model. Data-driven, last-click, and position-based approaches answer different questions, so don't change attribution because one report looks more flattering.
Beginner Best Practices for a Strong First Campaign
Your first campaign should be deliberately boring. Keep the targeting tight, control the budget, and make every keyword earn its place. Broad match can wait. Start with phrase and exact match so the search intent stays close to the offer, then expand only after the account has useful conversion evidence.
Build negative keywords before the first ad runs. Common exclusions include jobs, free, tutorial, DIY, reviews, and competitor brands the business isn't authorized to bid on. The point isn't to create a perfect list on day one. It's to prevent obvious waste while the search terms report reveals how people search.
Practical rule: A small, controlled campaign teaches you more than a sprawling campaign you can't diagnose.
Set a daily cap that the business can tolerate if the first clicks are irrelevant. For early testing, the plan calls for keeping the first week's daily budget under $50, and Google Ads offers daily budget controls for pacing. Don't let one attractive search term consume the available budget before you've checked the landing page, call quality, and conversion tracking.
Keep the structure easy to inspect
Use one campaign for each business goal and one ad group for each close keyword theme. Write several responsive search ads per ad group, add relevant assets, and review the search terms report every week during the first month. The exact structure matters less than your ability to explain why every keyword and ad exists.
For creative production, an AI video ad generator can help you explore video concepts, but don't let polished assets distract from weak targeting or an unclear offer. A beautiful ad still fails when it attracts the wrong searcher.
Keywordme can work inside the Google Ads interface through a Chrome plugin to assign match types, add negative keywords, and manage search terms. Use it as one workflow option alongside native Google Ads reports and your own review process. Manual judgment still matters, especially when a search term has several plausible meanings.
Wrapping Up and Your Launch Checklist
Creating a Google Ads account starts with ownership and business details, then moves through campaign intent, billing, payment confirmation, and advertiser verification. A reliable launch also requires policy-aware landing pages, clean conversion tracking, and a restrained first campaign. The account is ready when the business can explain who owns it, who pays for it, what success means, and why every campaign setting exists.
Use this pre-flight checklist before you publish:
- Confirm business details: Check the legal name, website, address, country, currency, and time zone.
- Confirm access: Make sure the permanent business owner can sign in and recover the account.
- Finish billing: Add the approved payment method and complete any required payment verification.
- Complete identity checks: Submit requested organization details and readable documents before the deadline.
- Test tracking: Fire one test conversion and confirm it records once in the correct platform.
- Link analytics: Connect the GA4 property to Google Ads and verify auto-tagging.
- Load negatives: Add at least 50 negative keywords before launch.
- Set a cap: Keep the first week's daily budget under $50.
- Review destinations: Check mobile loading, offer clarity, terms, and redirect behavior.
- Inspect the first searches: Review the search terms report regularly and remove irrelevant traffic.
Save this PPC campaign checklist and revisit it after the first seven days of spend. Adjust based on recorded searches, conversions, and lead quality, not on gut feel.
Keywordme helps advertisers clean search terms, assign match types, build negative keyword lists, and manage keyword workflows directly inside Google Ads. Visit Keywordme before launch to make the first campaign easier to control and the early optimization work less manual.
.svg)